📘 Day 13 (2025.07.07.MON) - 마스커레이딩, Attack.py
🧩 header.php 수정
header.php에 물리보안 메뉴 추가
📤 내부에서 외부로 나가기
- Kali → Ubuntu 메일 전송
- PC1: 악성코드 설치 후 Hacker와 연결 시도
- PC1이 외부로 나가면 IP 변경 필요:
192.168.0.1 → 125.246.95.152
PC1 설정: 192.168.0.1 / 255.255.255.0 / 192.168.0.254

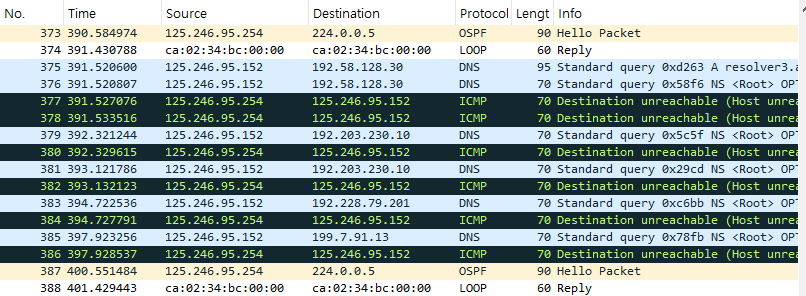
R2 → UTM 패킷 분석(125.246.95.254 - 패킷 분석하면 게이트웨이로 빠지도록 설정해놨음)
📡 R2 설정 (OSPF)
config t
hostname ST
interface FastEthernet0/0
ip address 125.246.95.254 255.255.255.0
no shutdown
exit
interface Serial1/0
ip address 1.1.1.2 255.255.255.252
no shutdown
exit
router ospf 1
network 125.246.95.0 0.0.0.255 area 0
network 1.1.1.0 0.0.0.3 area 0
router-id 2.2.2.2
exit
ip dhcp excluded-address 125.246.95.152 125.246.95.254
ip dhcp pool st
network 125.246.95.0 255.255.255.0
default-router 125.246.95.254
dns-server 125.246.95.152
lease 1 0 0 !
exit
hostname ST
interface FastEthernet0/0
ip address 125.246.95.254 255.255.255.0
no shutdown
exit
interface Serial1/0
ip address 1.1.1.2 255.255.255.252
no shutdown
exit
router ospf 1
network 125.246.95.0 0.0.0.255 area 0
network 1.1.1.0 0.0.0.3 area 0
router-id 2.2.2.2
exit
ip dhcp excluded-address 125.246.95.152 125.246.95.254
ip dhcp pool st
network 125.246.95.0 255.255.255.0
default-router 125.246.95.254
dns-server 125.246.95.152
lease 1 0 0 !
exit
🛰️ R1 설정 (Hacker 역할)
config t
hostname Hacker
interface FastEthernet0/0
ip address 100.100.100.254 255.255.255.0
no shutdown
exit
interface Serial1/0
ip address 1.1.1.1 255.255.255.252
no shutdown
exit
router ospf 1
network 100.100.100.0 0.0.0.255 area 0
network 1.1.1.0 0.0.0.3 area 0
router-id 1.1.1.1
exit
ip dhcp excluded-address 100.100.100.1 100.100.100.254
ip dhcp pool hacker
network 100.100.100.0 255.255.255.0
default-router 100.100.100.254
dns-server 125.246.95.152
lease 1 0 0 !
exit
hostname Hacker
interface FastEthernet0/0
ip address 100.100.100.254 255.255.255.0
no shutdown
exit
interface Serial1/0
ip address 1.1.1.1 255.255.255.252
no shutdown
exit
router ospf 1
network 100.100.100.0 0.0.0.255 area 0
network 1.1.1.0 0.0.0.3 area 0
router-id 1.1.1.1
exit
ip dhcp excluded-address 100.100.100.1 100.100.100.254
ip dhcp pool hacker
network 100.100.100.0 255.255.255.0
default-router 100.100.100.254
dns-server 125.246.95.152
lease 1 0 0 !
exit
🧯 UTM 방화벽 설정
Inside(Network) to Any 추가 & 로그 체크

🔄 마스커레이딩 이해
라우터가 알 수 없는 192.168.0.1 → 외부에선 인식 못함 → IP 변환 필요

🔌 Kali → Ubuntu2 연결
Ubuntu2 설정: /etc/netplan/50Tab 수정 후:
dhcp4: no
address: 192.168.1.2/24
gateway: 192.168.1.254
address: 192.168.1.2/24
gateway: 192.168.1.254
sudo netplan apply
Kali:
ssh -p 2222 master@geumsol.kr
🔍 도메인 정보 수집 (dnsenum)
dnsenum geumsol.kr
nmap -v -A st.geumsol.kr
nmap -v -A st.geumsol.kr
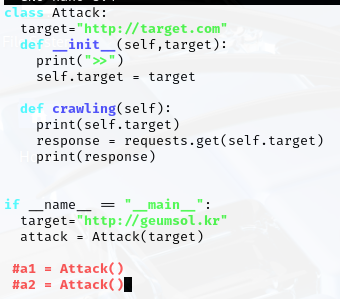
🧪 웹 크롤링 (Attack.py)
Kali에서 실행 → 로그에서 확인 가능
python3 Attack.py
Ubuntu 측 로그 모니터링:
tail -f /home/master/public_html/logs/access.log
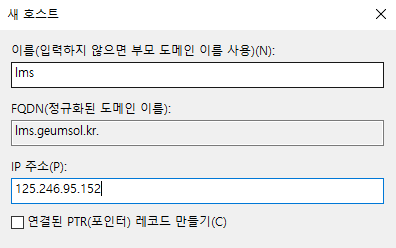
📚 DNS에 LMS 추가
LMS = Learning Management System
📧 이메일 수집용 공격 스크립트
📈 로그에서 비정상적인 요청 확인
예시:
100.100.100.1 - - [07/Jul/2025:05:58:58 +0000] "GET / HTTP/1.1" 200 333 "-" "python-requests/2.32.3"
📗 교재 참고
『화이트 해커를 위한 암호와 해킹』 p.43
💾 Attack.py 설치 준비 (Kali)
pip install requests
pip install bs4
pip install beautifulsoup4
pip install lxml
pip install selenium
→ 설치 완료 후 네트워크, IP 원상복구(100.100.100.1 100.100.100.254 125.246.95.152)
pip install bs4
pip install beautifulsoup4
pip install lxml
pip install selenium
🧾 Ubuntu2 index.php 내용
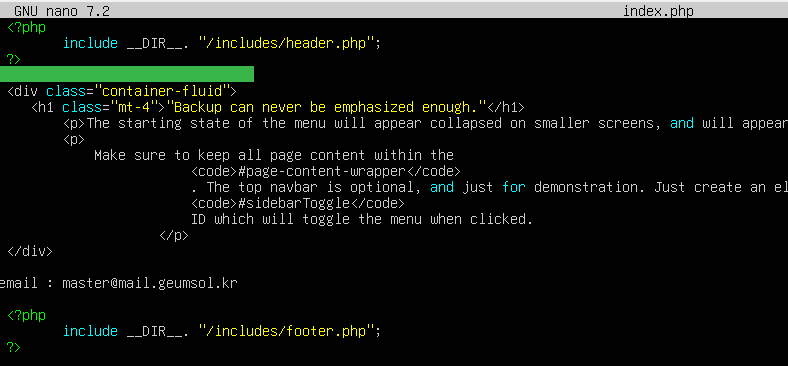
→ 서버에 email : master@mail.geumsol.kr
🧨 Attack.py 전체 코드
import requests
from bs4 import BeautifulSoup
import re

class Attack:
  target = "http://target.com"

  def __init__(self, target):
    self.target = target

  def crawling(self):
    print(self.target)
    response = requests.get(self.target)
    print(response)
    if response.status_code == 200:
      email_pattern = r"[a-zA-Z0-9._%+-]+@[a-zA-Z0-9.-]+\.[a-zA-Z]{2,}"
      soup = BeautifulSoup(response.text, 'html.parser')
      text_content = soup.get_text()
      emails = re.findall(email_pattern, text_content)
      unique_emails = set(emails)
      print(unique_emails)

if __name__ == "__main__":
  target = "http://geumsol.kr"
  attack = Attack(target)
  attack.crawling()